Choosing the right design elements can help your team members do their jobs better—and faster.
By Michael D. Smith
If you could change anything in your current veterinary facility, what changes would help you perform your job more easily? Once you pose this question to every team member, you’ll have the information you need to build or renovate a facility that supports efficient work habits throughout the hospital. Use the following ideas to help jumpstart your efforts.
Reception Areas
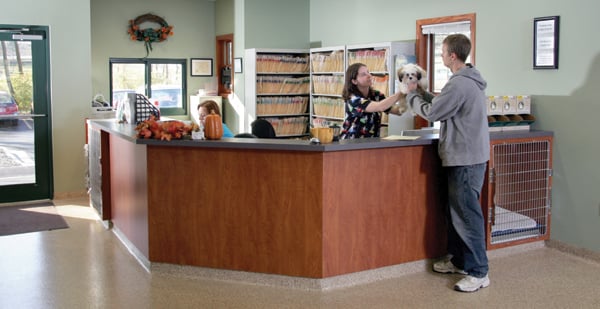
For receptionists to work efficiently, they need a front desk area that can accommodate multiple owners and their pets, says Stephen J. Kramer, a San Antonio-based architect with extensive experience in veterinary hospital design. That means ample counter space and, better yet, separate check-in and checkout areas. Some clinics build a separate telephone station so one person can man the phones while another person can attend to clients without interruption.
Another way to increase efficiency up front is by making communication with team members in the back easier. You can accomplish this with a practicewide telephone system, overhead paging, and a design that provides easier access to the treatment area.
Exam and Treatment Areas
Technicians and veterinarians perform most of their jobs in exam rooms and treatment rooms. To encourage efficiency in exam rooms, many new clinic owners equip these rooms with telephones, computers, and even desks. This allows doctors and technicians to access patient files and communicate with other team members without leaving the room.
If square footage is an issue, the exam pod concept—a new trend in veterinary hospital design—groups exam rooms around a central area. Each room has one door that opens into this area.
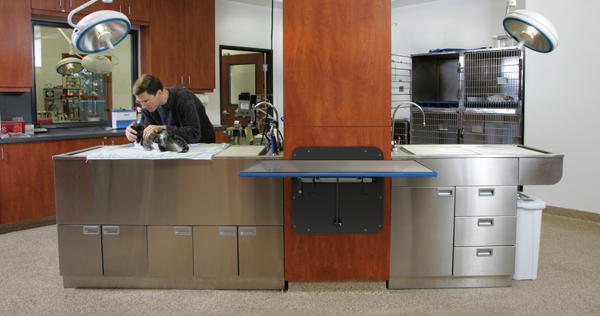
Traditionally, the treatment area is the hub of the hospital. At Magrane Pet Medical Center in Mishawaka, Ind., the treatment area is a large space with the other clinic areas (except the exam rooms) radiating from it. “It’s an efficient arrangement for saving steps and allowing
verbal and visual communication between staff members,” says coowner Ronald Doversberger, DVM. “Nobody is wasting time walking up and down hallways.”
Equipment that serves dual purposes also increases efficiency. One example: a lift-table with a built-in scale. At Magrane Pet Animal Hospital, every exam room features a drop-leaf, foldup, or mobile lift table. Such options accommodate different patients with ease and speed.
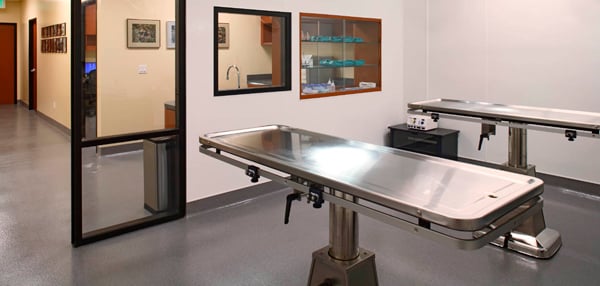
Surgery Rooms
Technicians and veterinarians also spend a considerable amount of time in the surgery suite. To work efficiently, Kramer says ample space is essential. “The space should accommodate anesthesia or specialty equipment (e.g., ultrasound) and provide enough room so everyone can move around easily,” he says.
Pass-through windows between prep and surgery areas also save time and, therefore, improve efficiency. Capitalizing on the time-saving aspect of pass-through windows, some clinics install these windows in laboratories and pharmacies toallow access to other areas, such as treatment and reception.
Speaking of pharmacies, Dr. Doversberger explains how a simple design strategy solved a
recurrent problem for staff members. “We fill lots of prescriptions every day,” he begins. “In our old hospital, the staff would have to refill the allotted space for vials and caps three times a day. In our new hospital, we eliminated this problem by designing cabinetry with extra-large bins. It worked out perfectly.”
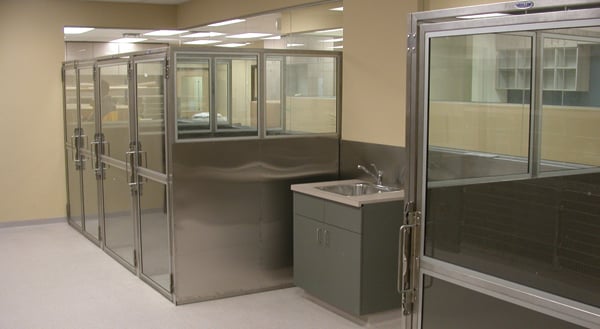
Boarding and Grooming Areas
When it comes to boarding and grooming areas, one word is synonymous with efficiency: cleanliness. The easier it is for team members to keep these areas clean, the more time they’ll have to attend to animals’ needs.
What design elements facilitate easy cleanup? Wall and floor coverings are two important ones. In addition, Kramer says his firm likes to incorporate trench drains that can be flushed automatically. He also recommends a central, in-wall vacuum system, which makes cleaning even more efficient because it can be used throughout the entire hospital.
Boarding and grooming personnel can also work more easily, quickly, and safely if the clinic provides a step-up tub for larger dogs.
These ideas are only the beginning. When you sit down with staff members to gather their input, develop a list of design elements that meet your specific needs. The criterion is quite simple: Any feature that makes it easier for you and your team members to do your jobs better means more efficiency—and that makes a great case for including that feature in your new hospital.


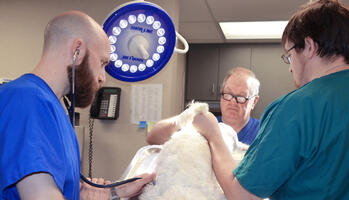
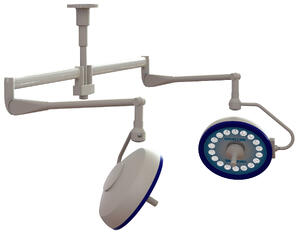 ED lights became state-of-the-art in human surgical suites. Now they are quickly making their way into veterinary practices.
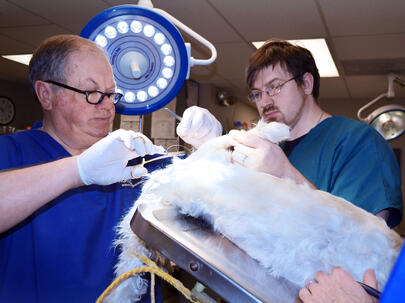 George Gates, DVM, at Prairie Village Animal Hospital in Prairie Village, Kan., was one of the testers.