Welcome to the Shor-Line Blog!

How Should I Handle Pest Control in a New Clinic?

Posted on Fri, May 24, 2013 @ 02:33 PM

shor-line blog

divider

Pest protection is both an exterior and interior concern. Termites can sabotage a clinic’s outside walls, and pets can bring fleas and ticks inside. Prevent all three from invading your clinic with these patient-safe strategies from James Marshall Jr., AIA, in Prairie Village, Kansas:

divider

TERMITE TREATMENTS

  • Treat the ground before building begins. Pesticides that are applied under the foundation are too deep to endanger animals.
  • If possible, keep all structural wood one foot above the soil.
  • Choose wood that has been pressure-treated with pesticides for structural beams and fence posts.
  • Install metal termite shields around in-ground wooden beams.
  • Avoid stucco siding that reaches the ground. The porous material creates termite entry points.

divider

FLEAS & TICKS

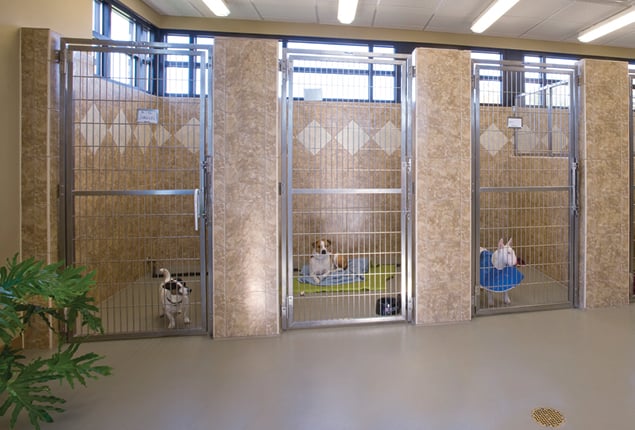
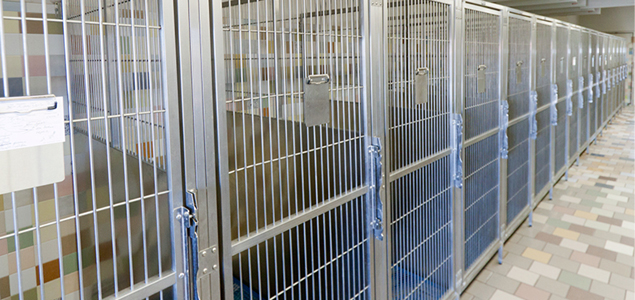
  • Extend floor tiles about five inches up the sides of the walls, using epoxy for the grouting. These materials can withstand frequent cleaning, but fleas and ticks can’t. Less expensive linoleum and sheet-vinyl floors are also an option, but they can crack within a few years of installation, so repair costs often offset the initial savings.
  • Seal case work and plumbing features with silicone. This coating denies fleas and ticks access to their favorite hiding places.


Tags: Animal Care, Facility Design, Hospital Design, Q&A, Industry Trends

Tips for an Exceptional Exam Room

Posted on Fri, May 17, 2013 @ 11:19 AM

 Exceptional Exam Rooms

divider

Clients spend the most time here, so let the design illustrate your level of care and competence.

Once upon a time, veterinary exam rooms were comfortable, uncluttered, and easy-to-clean areas where practitioners performed physical examinations on pets. This definition isn’t wrong, it’s just outdated. Today’s exam rooms need more features that reflect the high-quality care and customer service clients have come to expect.

When it’s time to design or renovate your exam rooms, modernize them by ensuring they fit these criteria suggested by Dennis Cloud, DVM, owner of Cloud Veterinary Center in St. Louis, Mo.


divider

1. PLENTIFUL
Fit as many exam rooms into your clinic as possible. “Contemporary exam rooms are used for more than physical exams,” Dr. Cloud says. “They’re also used to educate clients, schedule follow-up appointments, and check out clients. We have two rooms per doctor now, and we frequently need another.”


divider

2. SPACIOUS
Make the rooms large enough to use the space efficiently. “It’s not unusual for me to have a mother, three kids, and two Labradors in one exam room,” Dr. Cloud says. “You need enough space to sit down with clients, talk to them, and put them at ease.”


divider

3. FLEXIBLE
Equip at least one exam room with a mobile, lifting exam table. If a client arrives with a dog that’s been hit by a car, you can take the table out to the car and return directly to the exam room with the dog.

In other rooms, folding wall tables save space and eliminate a barrier between you and clients. They can also create a more open feel in exam/grieving rooms.


divider

4. WELL-ORGANIZED
Adequate storage space is essential for a thoroughly equipped exam room, so plan ahead. And don’t forget client education materials. Dr. Cloud stores his inside the cabinets and displays them in wall racks.


divider

5. TECH-READY
Every exam room should have a computer keyboard and monitor, Dr. Cloud says. This allows staff members to check medical records, schedule follow-up appointments, and take payments. Often, clients feel more at ease when they can talk about money or credit in private. (With wireless capabilities, staff members can use laptop computers. Flat-panel, wall-mounted monitors save space.)

To educate clients more effectively, upgrade your clinic with digital technology (e.g., digital photography, radiography, ultrasonography, endoscopy, and electrocardiograms) so clients can see images and results on the exam room monitors.

Tags: Animal Care, Facility Design, Hospital Design

Thinking Beyond Aesthetics – A Technical Viewpoint

Posted on Wed, Apr 24, 2013 @ 02:42 PM

shor-line blog

Here is a quick little exercise: Take 30 seconds to reflect on some of the day-to-day tasks that take place around your hospital. Not just the more obvious ones, like surgeries, but some of the more basic tasks that while small are still a critical part of the overall operation of your hospital, such as sterilizing equipment and restocking supplies.

Now think about how these tasks are affected by the design and layout of your space. Is your shelving at an easily accessible height? Are your countertops deep enough?  Is equipment easily accessible, especially in an emergency?

Hopefully, you just opened your eyes to some of the smaller, but vastly important, aspects that go into designing a new hospital. It is easy to get fixated on the bigger aspects of hospital design, like the overall look of the building or how spaces work and flow together. But successful hospital design also comes from designing for these “small things”.

Over the years, we have learned how vastly important equipment coordination is when designing a new facility. It’s an essential component that is often overlooked or left until the end. But the sooner we can coordinate equipment with our clients, the better off we all are in the end. From defining the necessities like lab equipment and animal housing, to determining how equipment will be used and stored in areas from treatment to offices, early equipment decisions can create a more efficient and well thought out hospital.

Let’s take the pack/prep area for example. Every veterinarian has different needs in their pack/prep. Specialty hospitals might require a large floor model autoclave, but a standard veterinary practice may only utilize a countertop model. Either way, there are design considerations.

With a floor autoclave, considerations include the overall size of the unit, required floor clearances around the autoclave, and even the coordination of a floor sink and built-in hot and cold water plumbing for the unit. As one can imagine, these requirements will quickly begin to dictate the overall size of your pack/prep area.

On a smaller scale, a general practice hospital will likely use a countertop autoclave, which might not seem like a big deal. However, most countertop autoclave models are actually deeper than a standard 24-inch counter. So building a deeper cabinet base might be imperative to the design. In addition, the manufacturers of these countertop models typically recommend the use of distilled water. So will you bring in outside bottles of distilled water? Or would you rather have a relatively inexpensive reverse osmosis system built in at your sink in pack/prep? These are all examples of the everyday things that are important to consider during the design and coordination stages of your hospital project.

Due to the large amount of equipment utilized in treatment, this is another important area of your hospital to think through thoroughly. Consider the ultrasound machine and think about its actual size. Where will it be located while in use?  Where will it be stored? The same applies to a crash cart. You want your crash cart to be easily accessible, but out of the way when not needed. You could have an empty alcove to tuck the cart into when not in use, or maybe a blank section of wall off to the side would be sufficient. How about your anesthesia equipment?  Will you be using mobile machines or wall mounted? If they are wall mounted, a specific location on your treatment column will need to be reserved. The list goes on and on…

What can you do to be prepared when it comes time to design your hospital?

  • Decide Old Versus New. Will you be reusing equipment from your existing facility? If so, which pieces? In contrast, which pieces of your current equipment need to be replaced? Do you need to purchase any new equipment that you don’t already have? Are there any pieces of equipment that you plan to purchase in the future as your practice grows, and how can you plan for and accommodate for them in advance?
  • Collect Information. If you are planning to reuse current equipment, start gathering your information ahead of time. Write down the model numbers and/or dimensions of each item. Locate the operation manuals for each piece of equipment; these usually describe any required special conditions and can often be found online.
  • Go Shopping/Browsing in Advance. Make a list of the new equipment you need to purchase and become educated on the products available. In today’s market, medical technology is constantly changing, and therefore, so are the available products. Do your research. Talk to your colleagues about what equipment they use. Visit trade shows; there is no better place for one-stop shopping. You won’t be expected to have all your equipment purchased in advance, but having an idea of which specific products you think you want can go a long way during the early design process.
  • Share. Compile all of the information you have collected into a folder or spreadsheet, or whatever works best for you. Be sure to give this information to your design team as early as possible so everyone is on the same page.

Ultimately, the more upfront equipment planning you can do the better. Having an architect who knows the ins and outs of veterinary equipment and design will also help immensely. The combination of your upfront planning and the architect’s expertise will allow for the ultimate collaboration on your new hospital – a collaboration that will result in a smooth design process and a well thought out hospital that will work for you for many years to come.

shor-line blog

Tags: Facility Design, Hospital Design, Contributing Editors, Animal Arts Editors, Industry Trends

Must-Haves for Your New Hospital: Part 7

Posted on Thu, Apr 18, 2013 @ 03:31 PM

shor-line blog

divider

MUST HAVE #7: CLEAN, WELL-VENTILATED ANIMAL HOUSING
Don’t give animal housing short shrift just because people spend less time there. Instead, install well constructed runs; maintain bright, well-painted walls; and make sure the areas receive proper heating, cooling, and ventilation.

Some practice owners play videos in the waiting area to show clients the clean, pleasant conditions their animal housing offers. Others set up Web cameras so clients can see images of their pets online from a hotel in Paris or a vacation house on Cape Cod.

Of course, your idea of hospital essentials might not include Web cameras. You may prefer to order a lift table for one exam room instead. But once you decide what you must have, you can concentrate on resolving any design uncertainties.

shor-line blog

divider

READ OTHER PARTS OF THIS SERIES: 1 2 3 4 5 6

Tags: Facility Design, Hospital Design, Special Hospital Design Series

6 Considerations When Planning Your Kennel Run Area

Posted on Tue, Apr 16, 2013 @ 02:13 PM

shor-line blog

shor-line blog

divider

#1: KNOW YOUR DESIGN GUIDELINES

  • Facility design guidelines play an important role in the choice of a Kennel Run System.
  • Without renovation, most pre-existing construction lends itself to one type of system over another.
  • For a new facility, having an understanding of design considerations beforehand will better facilitate the installation of your Kennel Run System.
  • Detailed design guidelines for each of the 5 Standard Kennel Run Systems are available from Shor-Line. It is vital to take design guidelines into consideration during the early planning stages of your boarding or holding area.

divider

#2: KEEP LEAD TIMES IN MIND
Lead time varies upon the type of run system and the drawing approval process. Choosing standard size gates and side panels for your facility provides you the shortest lead time for your order. Inventory of many of the standard sizes of gates and side panels are kept on-hand. Your sales representative can give you a current list of items in stock and lead times.

divider

#3: REVIEW THE 5 STANDARD KENNEL RUN SYSTEMS
Reviewing the PROs and CONs of each type of system will help guide you through the process and allow you to choose the system that will work best for you and your facility.

divider

#4: LEARN THE FLOOR SYSTEMS
When designing your Kennel Run System it is important to choose the best system for your facility, this includes floor type. Different floors can adapt to an existing or new facility in unique ways. Knowing how they work can save you headaches down the road.

divider

#5: AVOID THE UNNECESSARY EARLY ON

Knowing the difference between standard and custom/special size runs will help you to take steps to reduce purchase, installation and replacement costs. This will help you to avoid making unnecessary or special accommodations to your facility before installation.

divider

#6: PONDER THE AESTHETICS & USABILITY
For just about any Kennel Run System, there are options available. Some, such as drain options, are dependent on facility design, while some, such as colors, are not.

shor-line blog

divider

WANT TO LEARN MORE?

Download our Choosing a Kennel Run System Guide!

divider

Tags: Facility Design, Hospital Design, Shor-Line

Must-Haves for Your New Hospital: Part 6

Posted on Wed, Apr 10, 2013 @ 09:50 AM

shor-line blog

divider

MUST HAVE #6: UNCLUTTERED, MODERN EXAM ROOMS
What clients see in the exam room often determines what they think about the medical side of the practice. Dimly lit, smelly, and cluttered exam rooms will raise a red flag for any client.

“You could have the greatest reception area in the world, but if the exam room is messy, the client is going to think that’s what your practice is like,” Chapel says. He recommends a bright, clean, orderly exam room with a good ventilation fan. The exam room is also a great place to showcase high-tech equipment, such as an X-ray reader or exam light, because it shows clients you run a state-of-the-art practice.

shor-line blog

divider

READ OTHER PARTS OF THIS SERIES: 1 2 3 4 5 7

Tags: Facility Design, Hospital Design, Special Hospital Design Series

Must-Haves for Your New Hospital: Part 5

Posted on Wed, Apr 03, 2013 @ 09:37 AM

 shor-line blog

divider

MUST HAVE #5: A CLIENT CONVENIENCE COUNTER
Children aren’t the only ones vying for clients’ attention. With cell phones, busy clients can now take care of personal and professional business wherever they go.

Well-designed waiting rooms now include client convenience counters—out-of-theway desks that resemble library carrels. Equipped with a pen and notepad (imprinted with the hospital’s logo, of course), these counters allow clients to take notes during calls. Adding coffee or bottled water will impress your clients even more.

shor-line blog

shor-line blog

divider

READ OTHER PARTS OF THIS SERIES: 1 2 3 4 6 7

Tags: Facility Design, Hospital Design, Special Hospital Design Series

Don't Let Color Scare You

Posted on Tue, Mar 26, 2013 @ 10:53 AM

shor-line blog

Brought to you by Contributing Editor Ashley M. Shoults of Animal Arts.

It happens all the time.  You reach the point in the design of your hospital where it’s time to pick material and paint colors, and the stress and anxiety begins to set in.  How can I pick colors from just these little samples?  Should I choose a bold, vibrant and exciting color palette or stick to more traditional neutral shades just to play it safe?  And no matter what I choose, how will these colors actually look when they are installed?  These are the types of questions many people ask as they design their hospital, and it’s only natural.  Color can be a scary and daunting thing.  But it doesn’t have to be!

Vibrant, punchy colors are the “in” thing these days.  Just look at the past two Pantone Colors of the Year….Tangerine Tango and Emerald Green!

shor-line blog  shor-line blog

It might be hard to picture a whole wall painted in one of these very bright colors.  They seem overwhelming, right?  But when used correctly, these vibrant colors can really liven up your hospital space.

For those who don’t mind living on the edge, using lively paint colors as accent walls can be really fun and energizing.  However, be careful not to overdo the accent colors or your space might start to overstimulate you, your staff and your clients.  

One technique to find balance when using bright colors is to let neutral colors ground the space.  For example, design your floors and cabinetry with neutral and sophisticated colors, and then add punch with bright, lively accent walls.

shor-line blog shor-line blog

Hospitals can also look really great when color is used virtually everywhere.  That might sound overpowering, but when done right, it not only enlivens your space, but also warms it up and makes it feel more inviting.  The trick with this approach is choosing colors that are a little less intense and that are within the same color family and general tone.

shor-line blog

If you prefer a more traditional aesthetic, there are ways to bring color into your space without bright accent walls.  Try letting your cabinetry or furniture do the talking.  Even though the current trends are showing bold, vibrant colors as the new thing, many designers are creating rooms with very neutral colors on the hard-built environment (walls, floors, etc.) and adding accent colors through furniture, cabinetry, and other decorative items.  For example, you could pick a brighter color for your built-in cabinetry or add some colorful pendant lights above the reception desk and some artwork to add a fun factor to the space.  Or perhaps pick some vibrant fabrics for your lobby seating to jazz things up.

shor-line blog shor-line blog

Ultimately, when it comes to picking the colors for your new hospital or renovation, the goal is to not let color scare you.  When done right, color can often be a key factor to bringing in a little touch of energy and interest that makes your hospital feel more welcoming.

Tags: Facility Design, Hospital Design, Contributing Editors, Animal Arts Editors, Industry Trends

Must-Haves for Your New Hospital: Part 4

Posted on Thu, Mar 21, 2013 @ 09:42 AM

 shor-line blog

divider

MUST HAVE #4: A CHILDREN'S PLAY AREA

Clients are often faced with tough decisions, such as whether to euthanize a pet or approve a costly surgery. Imagine trying to make those decisions with a young child pulling at your leg. A play area in the waiting room occupies children and allows doctors and parents to talk without interruptions.

 shor-line blog

 shor-line blog

divider

READ OTHER PARTS OF THIS SERIES: 1 2 3 5 6 7

Tags: Facility Design, Hospital Design, Special Hospital Design Series

Must-Haves for Your New Hospital: Part 3

Posted on Thu, Mar 14, 2013 @ 02:17 PM

 shor-line blog

divider

MUST HAVE #3: MULTIPLE SEATING AREAS

Once clients check in, they head straight to the waiting area. The best-designed waiting rooms are separated into alcoves by dividers, such as half-height walls or large potted plants. This allows clients to find their own comfort levels—away from a noisy child, for example.

 shor-line blog

 shor-line blog

divider

READ OTHER PARTS OF THIS SERIES: 1 2 4 5 6 7

Tags: Facility Design, Hospital Design, Special Hospital Design Series