Welcome to the Shor-Line Blog!

Kennel Run System Hardware - Protect It!

Posted on Wed, Sep 25, 2013 @ 01:08 PM

kennelsystemhardware header

Written by contributing editor Rob Eckwall

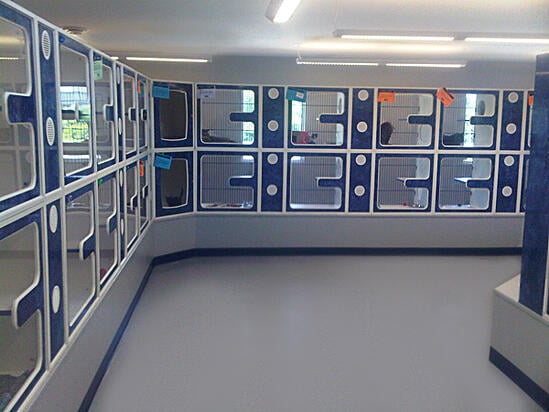
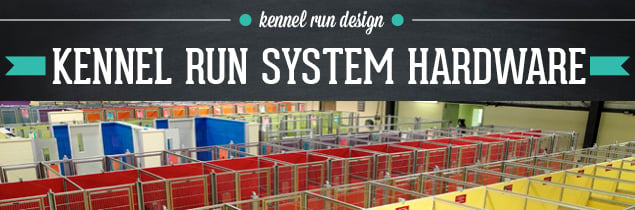
Kennel Runs are an important part of a successful veterinary or animal care enterprise, but kennel runs are only as good as their installation. An installation is only as good as the installers and the hardware they use to do it. This post focuses on issues related to kennel run hardware.

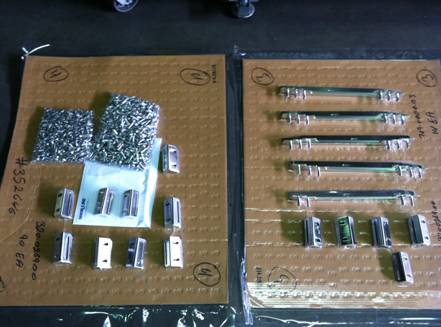
Quality kennel run products will come complete with the specialized hardware necessary to install them properly. This includes high-quality stainless steel barrel nuts & screws, face plates, trim, latch bars & brackets and customized connectors for whichever type of installation your job requires. 

A manufacturer should know how important hardware is to a kennel run system.  With this in mind, following these guidelines ensures the best possible outcome for a new kennel run project:

Unknown

  • As soon as possible upon delivery of your order, make sure all hardware is labeled, received, and accounted for. Some hardware may have been manufactured specifically for your job therefore it is very important to account for all hardware as soon as possible.
  • Contact your provider immediately if there are any questions or problems.
  • Segregate your hardware from surrounding construction activities and keep hardware together. Protect it.
  • Bulk fastener hardware (i.e., barrel nuts and screws) will likely include an extra 10% or so over what is required. For all other hardware it is more likely that the exact amount will be provided (although there may be an extra piece or two for some items).
  • Refer to your installation manual and only take and use the hardware needed for each run, room, or area you are working in – do not move it in bulk to each area. This helps prevent hardware from getting lost, misplaced, and/or scattered throughout the job site and becoming difficult to account for later on.

In the unlikely event of a shortage in your hardware, your provider should supply the remainder needed to finish the job. If for some reason however you wind up needing ‘extra’ hardware, you will likely be charged for it and the shipping of it. If next day air is requested, you will likely incur those charges as well.

Following the guidelines above will help you stay on track and complete your construction project in a timely manner. 

Tags: veterinary equipment, veterinary clinic, veterinary, Animal Care, Facility Design, Hospital Design

Kennel Run Systems Order Process

Posted on Tue, Sep 10, 2013 @ 01:16 PM

orderprocess header

Written by contributing editor Rob Eckwall

It all starts with you.

This will be a much more individual purchase than it is for many of the other items in your veterinary hospital. You don’t just open a catalog and select from a couple of options like you would for a table, tub, or scale. While all kennel gates and panels are made to standard design parameters they are configured to meet your individual needs.

It is important to remember that the building is part of the Kennel Run design. Things like wall construction, window and door locations, drainage and floor slopes are all part of your kennel considerations. For most people this is a long-term investment. Cutting corners on the design and construction now will most likely result in higher costs for maintenance and repairs later. Good drainage and airflow along with a well-lighted kennel will provide a safe, comfortable environment for both the client and the staff. It is also important to choose materials that do not absorb water or harbor bacteria.

Common steps in the order process for any installation type:

1. We will require a sketch or drawing of your new or existing Kennel Run area. It should include room size measurements along with door, window, and drain locations. It is also helpful to know the planned use of kennels (i.e.,: boarding, hospital patient, Icu and recovery, etc.). this will assist with selecting the best options.

2. Choose the options that are right for your needs:

  • Grill or glass gate
  • Food or water bowls
  • Transfer doors
  • Partition panels
  • Grill or glass above 48” height on partitions

3. Get a quote based on the number of Kennel Runs and configuration with the options you have chosen.

4. You will receive drawings for approval. These will illustrate the options you have chosen, show how they are installed and indicate the sizes and space requirements for your installation. This is a critical step in the process. Your kennels will be manufactured per these drawings. Also, the correct hardware needed for a successful installation will be determined from these drawings.

5. Once we have approved drawings your order can be finalized. This is also when all credit terms must be agreed upon and any down payments applied.

6. The lead time for your order is determined on an individual basis. We make every attempt to meet your schedule. However, things like current shop capacity, other items on your order, the size of your order and amount of custom work required all affect your lead time.

Once your order is complete you must be prepared to receive your shipment. Your order will be shipped to you by truck line. Your components will be on pallets that can be moved both in our warehouse and by the shipper by forklift. Depending on the size and type of gates and panels you have ordered each piece may weigh 50 – 100 lbs. Unless other arrangements have been made it will be your responsibility to unload the truck and bring the gates and panels into your facility. Knowing what to expect, and the steps involved, should help the process go smoothly and alleviate at least some of the stresses involved with a project of this type.

As always, feel free to call us at 800.444.1579 at any time during your order with any questions or concerns. We are happy to help.

Tags: veterinary equipment, veterinary clinic, veterinary, Animal Care, Facility Design, Hospital Design, Shor-Line

Get On Board

Posted on Fri, Jul 12, 2013 @ 11:49 AM

shor-line blog

Effective July 1, 2013 T-Kennel will be an integrated product family within the Shor-Line brand. Schroer Manufacturing Company acquired T-Kennel in 1994 as an expansion of the kennel run product family pioneering specialized kennel run systems with proprietary drainage systems.

Kansas City brothers Karl and Gerhard Schroer founded Schroer Manufacturing Company in 1927 based on the principle of quality craftsmanship and materials. While the company has evolved over the past 86 years, the brothers would be proud to know that Shor-Line’s dedication to customer service has remained the number one priority.

By integrating T-Kennel into the Shor-Line brand, we will maintain the tradition of superior customer service. Providing a family of kennel run products that customers can tailor to their needs, specifications, and price point. This will serve you, our valued customer, more efficiently. In addition to serving you, we will continue to collaborate with industry professionals to offer innovative products that enhance animal care.

shor-line blog

Tags: Animal Care, Facility Design, Hospital Design, Shor-Line Happenings

How Should I Handle Pest Control in a New Clinic?

Posted on Fri, May 24, 2013 @ 02:33 PM

shor-line blog

divider

Pest protection is both an exterior and interior concern. Termites can sabotage a clinic’s outside walls, and pets can bring fleas and ticks inside. Prevent all three from invading your clinic with these patient-safe strategies from James Marshall Jr., AIA, in Prairie Village, Kansas:

divider

TERMITE TREATMENTS

  • Treat the ground before building begins. Pesticides that are applied under the foundation are too deep to endanger animals.
  • If possible, keep all structural wood one foot above the soil.
  • Choose wood that has been pressure-treated with pesticides for structural beams and fence posts.
  • Install metal termite shields around in-ground wooden beams.
  • Avoid stucco siding that reaches the ground. The porous material creates termite entry points.

divider

FLEAS & TICKS

  • Extend floor tiles about five inches up the sides of the walls, using epoxy for the grouting. These materials can withstand frequent cleaning, but fleas and ticks can’t. Less expensive linoleum and sheet-vinyl floors are also an option, but they can crack within a few years of installation, so repair costs often offset the initial savings.
  • Seal case work and plumbing features with silicone. This coating denies fleas and ticks access to their favorite hiding places.


Tags: Animal Care, Facility Design, Hospital Design, Q&A, Industry Trends

Tips for an Exceptional Exam Room

Posted on Fri, May 17, 2013 @ 11:19 AM

 Exceptional Exam Rooms

divider

Clients spend the most time here, so let the design illustrate your level of care and competence.

Once upon a time, veterinary exam rooms were comfortable, uncluttered, and easy-to-clean areas where practitioners performed physical examinations on pets. This definition isn’t wrong, it’s just outdated. Today’s exam rooms need more features that reflect the high-quality care and customer service clients have come to expect.

When it’s time to design or renovate your exam rooms, modernize them by ensuring they fit these criteria suggested by Dennis Cloud, DVM, owner of Cloud Veterinary Center in St. Louis, Mo.


divider

1. PLENTIFUL
Fit as many exam rooms into your clinic as possible. “Contemporary exam rooms are used for more than physical exams,” Dr. Cloud says. “They’re also used to educate clients, schedule follow-up appointments, and check out clients. We have two rooms per doctor now, and we frequently need another.”


divider

2. SPACIOUS
Make the rooms large enough to use the space efficiently. “It’s not unusual for me to have a mother, three kids, and two Labradors in one exam room,” Dr. Cloud says. “You need enough space to sit down with clients, talk to them, and put them at ease.”


divider

3. FLEXIBLE
Equip at least one exam room with a mobile, lifting exam table. If a client arrives with a dog that’s been hit by a car, you can take the table out to the car and return directly to the exam room with the dog.

In other rooms, folding wall tables save space and eliminate a barrier between you and clients. They can also create a more open feel in exam/grieving rooms.


divider

4. WELL-ORGANIZED
Adequate storage space is essential for a thoroughly equipped exam room, so plan ahead. And don’t forget client education materials. Dr. Cloud stores his inside the cabinets and displays them in wall racks.


divider

5. TECH-READY
Every exam room should have a computer keyboard and monitor, Dr. Cloud says. This allows staff members to check medical records, schedule follow-up appointments, and take payments. Often, clients feel more at ease when they can talk about money or credit in private. (With wireless capabilities, staff members can use laptop computers. Flat-panel, wall-mounted monitors save space.)

To educate clients more effectively, upgrade your clinic with digital technology (e.g., digital photography, radiography, ultrasonography, endoscopy, and electrocardiograms) so clients can see images and results on the exam room monitors.

Tags: Animal Care, Facility Design, Hospital Design

Client-Friendly Boarding

Posted on Fri, Aug 10, 2012 @ 03:28 PM

The best boarding facilities and services are designed with pets—and their owners—in mind.

By Kristi Reimer

Shor-Line Blog

When clients bring their pets to your boarding facility, do they look worried, apprehensive, or guiltridden? If so, then you’ve got work to do. Your facility and services need to elicit smiles from pet owners who feel perfectly comfortable leaving their “family members” in your care. Much of that hinges on what clients smell, hear, and see.

Wipe Out Odor
One of the biggest client turnoffs is odor, says E. John Knapp, AIA, an architect specializing in kennel design. If you have concrete floors, give your kennel this test right now: Pour some water on the floor. If the floor turns dark, that means the concrete has absorbed the urine, and odors will follow. The worst part: “Concrete smells last forever,” says Knapp.

One solution is to cover the concrete so that it can’t absorb liquid. Knapp recommends glazed quarry tile with epoxy grout joints, but less costly materials are also available. One practical strategy is to use commercial-grade sheet vinyl. Install the flooring with the room empty, roll it 6 to 8 inches up the sides of the walls without a cut at the base, and place the kennels and runs on top. If it’s necessary to create seams, have them sealed with heat because chemically sealed joints tend to loosen over time.

Another essential element of an odor-free facility is ventilation. According to Knapp, a big fan that sucks air out of the room doesn’t exhaust the air properly. He recommends using the same type of heating and air conditioning systems found in office buildings. “They pump fresh air in and bad air out,” Knapp says. “Plus, clients want clean air and comfortable temperatures for their pets.”

Knock Out Noise
To control the barking frenzy, Knapp has a simple solution: Treat the entire ceiling and top section of the walls above the doors with a spray-on cellulose material called K-13 (see www. spray-on.com). This substance, which comes in six colors, absorbs sound and keeps it from reverberating around the room. If you’re designing a new facility, Knapp recommends at least 12-foot ceilings, which provide even better sound control.

You also need to consider sound control from room to room and from inside to outside. Contrary to popular belief, a regular wall with fiberglass insulation does not muffle enough sound for most kennels or city planning commissions, Knapp says. The average wall stops up to 35 decibels, and most cities require sound control of 50 to 55 decibels. Drywall manufacturers produce dozens of standard walls with various sound transmission classes, so consult an architect or builder to help you
make the appropriate choice.

Pay Attention to Appearance
As many retailers have discovered, one of the most important considerations for drawing and keeping customers is an attractive building, both inside and out. “Just think about the new Target stores,” Knapp says. “Target has figured out the importance of a goodlooking building.”

For the interior, think open, airy, and sunshiny. Your boarding space should look bigger than it is, and high ceilings and lots of windows can help accomplish this. In addition, clients like bright and cheery colors, which give an impression of cleanliness. Some practice owners have even hired artists to paint murals on the walls.

Shor-Line Blog

Keep Cats Content
A big hit with felines, Knapp says, are floor-to-ceiling cat condos with shelves at various heights and large windows to indulge the occupants’ birdchasing fantasies. “No cat—or cat owner—is happy with a 30-inch cage,” Knapp says.

One of Knapp’s clients in New Mexico found success with a bagel-shaped cat kennel built around a center atrium. The exterior walls are glass, so cats in the condos around the outside of the building can look out, and cats around the inside can look into the atrium. “The public is nuts about this facility,” Knapp says. “The owner built 40 condos, and, on average, 80% are occupied. It has made for happy cats and happy customers.”

All in all, Knapp says, if practitioners start thinking like retailers, figuring out what customers want and giving it to them instead of cutting costs at every corner, the public will respond with enthusiasm. “One of my clients built a beautiful 15,000-square-foot kennel with all the luxuries, and he broke even in three months,” Knapp says. “It’s a whole different attitude that pays off in the end.”

Shor-Line Blog

Tags: Animal Care, Facility Design, Hospital Design, Industry Trends

Animal Arts - From the Inside Out

Posted on Wed, Mar 21, 2012 @ 02:29 PM

Brought to you by Contributing Editor Vicki Pollard of Animal Arts.

“It is the pervading law of all things organic, and inorganic, of all things physical and metaphysical, of all things human and all things super-human, of all true manifestations of the head, of the heart, of the soul, that the life is recognizable in its expression, that form ever follows function. This is the law.”

In 1896, Louis Sullivan coined the phrase “form ever follows function” more popularly known as “form follows function.” At the time, this new idea marked a huge shift in American architecture. It allowed the design of buildings to better respond to the functions/tasks that were carried out inside of them, instead of strictly following historical precedence. Louis Sullivan devoted his attention to both the exteriors and interiors of his buildings. He strongly believed that the exterior of a building should reflect its interior functions. He allowed the function of the spaces he designed to influence the overall layout of these spaces. 

What if we examined the layout of animal care facilities the same way? How would each room be designed when it follows its functional layout or purpose? There are vast differences between the functions of an MRI suite and a cardiology exam room. The functions or procedures you perform in your facility every day should influence the design of your building. Operations, equipment and personnel all provide us with insight into how these spaces could be designed. Here are a few examples:

Operations

Day-to-day operations can drastically influence the layout of your hospital. Some important areas that come to mind are x-ray rooms and boarding or large dog holding areas. In radiology something as simple as choosing to sedate animals while x-rays are taken can influence the design of the room. Sedating an animal and having a nurse or technician take the image outside the room demands a unique layout. A window or alcove directly outside the x-ray room is needed to view the patient while the x-ray is being taken. 

The operation of cleaning and maintaining runs or boarding areas also has an impact on the layout of a space. In our animal shelters we recommend using runs that are back-to-back with a guillotine door in-between so you can usher an animal to one side while you clean out the other side. Because of the necessary repetition of cleaning dog runs, it is important to make sure that the layout of this area is as efficient as possible. Using a high-pressure sprayer versus a standard hose can have an effect on your spatial layout. A high-pressure spray system has to have a dedicated area for the main equipment along with dedicated power. If you are using a standard hose and mop to clean, having sloped floors and individual floor drains in each room will significantly cut down on cleaning time and will decrease cross contamination between runs.

Equipment

Knowing what types of equipment are going to be installed into your facility up front will greatly aid in designing the functional layout of the space. There are numerous large ticket items, such as fluoroscopy, CT and MRI equipment, that if not decided upon early in the design process can end up increasing your construction budget. While it is easier to keep large items in mind, sometimes we lose track of smaller items that can also influence the efficient design of a space.  One example is the ultrasound machine that is used mainly by technicians to perform Cystocentesis. Think about the actual size of this machine, where it will be located in your treatment room when in use, and where it will be stored. 

The second piece of equipment that can easily be overlooked is the ventilator. In some emergency or high volume intensive care units there are a fair number of ventilator cases. We have found that in these special facilities it is extremely valuable to design in a designated vent alcove. Typically this is created in the corner of the main ICU or CCU space. It needs to be in a relatively quiet part of the room, where traffic is minimized.  If you cannot take up valuable floor space for this, then at minimum mount a flip-down table, exam light and medical gasses on the wall.

Shor-Line Blog

Personnel

The third element to think about for “form follows function” is personnel. This last item is pretty simple.  When laying out the various spaces in your hospital, think about how many and what types of people will be needed for specific procedures. The best example of this is a surgery room. In the most extreme case, such as at a teaching hospital, the operatories will need to be oversized to accommodate a surgeon, intern, surgery technician, anesthesia technician, and visiting observers. Things can get pretty tight if the space is not designed to accommodate all of these people. Video conferencing, where the actual surgical procedure is captured via live feed into a conference room, is another way of accommodating a larger group of people with the same end result. Boom arms that hold cameras in the surgery suite and the layout of the conference area are both aspects of the design that need to be well thought out.

Shor-Line Blog

There are three key components to keep in mind as you are designing your facility to ensure that the form truly follows the function of the space. If your facility’s design is dialed into these components – operations, equipment layout and personnel – then your space will work well for years to come.

Tags: Animal Care, Facility Design, Hospital Design, Contributing Editors, Animal Arts Editors, Industry Trends

Shor-Line Takes An Industry Changing LEAP, Introducing Wireless Scale Kits

Posted on Wed, Feb 29, 2012 @ 11:10 AM

Happy Leap Day! We find it fitting that while we are celebrating a day that only comes around every four years, we take this time to provide the Shor-Line Community a sneak peek into a new product that leaps into new industry territory. We are proud to introduce Shor-Connect for all Shor-Line scales. This is industry changing!

Utilizing wireless technology you can now see a patient's weight instantly from many feet away on a PC or a remote display. When entering a hospital one of the first things a patient and their owner are asked to do is step on the scale. Now the patient can step on the scale while the technician or office assistant can click on the scale readout on their PC or view on a remote display and the weight is recorded right there. No wires, accurate, and located where you want it.

Shor Line viewer bottom right

Shor-Connect can be added to any scale product currently offered (excluding the feline scale) by Shor-Line and comes in two options. A PC Viewer Remote Display Kit that retails for $249 or the D320 Remote Display Kit that retails for $499. The PC viewer is equipped with all the features necessary for accurate weighing. Zero, Recall, Free/Lock, Manual/Auto and LB/KG. You can easily toggle between Manual and Auto modes as well as Pounds and Kilograms. Holding the weight is also done by the click of the mouse (or button).

Shor Line viewer no buttons  Shor Line viewer with buttons

If you desire the Remote Display you can mount the display to any wall desired and use the display as you would a typical Shor-Line scale display. The PC Viewer Remote Display offers you the flexibility of using a PC versus mounting a physical display to a wall. The PC display operates on Windows 7 and Windows XP platforms. Multiple applications of the Shor-Connect Viewer are only supported on Windows 7. The software is easy to install on your PC. The PC requires a USB Dongle for operation.

Shor-Connect will be available soon. Be sure to ask your Shor-Line Representative for more details of this industry changing product!

Tags: Animal Care, Promotions, Shor-Line Happenings, New Products, Industry Trends

Animal Arts – How to Ventilate a Cat Cage

Posted on Thu, Feb 09, 2012 @ 02:48 PM

Brought to you by Contributing Editor Vicki Pollard of Animal Arts.

Cats are susceptible to all manner of disease as a result of inadequate housing. The animal care industry is responding to this issue by promoting an increase in the size of individual cages and by enriching the cages with hiding boxes, resting ledges, and separated eating and litter areas.  However, we also need to address how to properly ventilate feline environments. In this article, we will explore practical solutions for getting fresh air into a cat cage and moving dirty air out.

Research from the UC Davis Koret Shelter Medicine Program indicates that airborne transmission is only the fourth most important cause of disease among cats in shelters behind fomite transmission, environmental contamination, and direct contact. In fact, studies show that cats do not have the lung capacity to project airborne pathogens across a room.

It is still important to a cat’s health and wellbeing to have the benefit of fresh, uncontaminated air.  Yet, most typical designs do not accomplish this simple goal. For example, even when one supplies 25 air changes per hour to a typical cat ward, the air exchange rate inside a cat cage can be almost negligible. This is because the cage is a dead air space outside of the primary air exchange pattern in the room.

The practice of aggressively ventilating an entire room does accomplish odor control, but it is not necessarily bringing much benefit to each cat. If we exchange air through the cat cage instead of around it, it is possible to achieve room odor control while reducing overall room air exchange rates and increasing the effective air exchange rates in the cats’ breathing zone.

Your cages don’t have to be built in to be ventilated. A rolling cage is a very practical home for a cat in a facility and has many advantages. It can be cleaned easily, it can be reconfigured based on need, and it can be rolled from room to room with its occupant inside to reduce unnecessary handling of cats, which is a significant source of stress. But how does one ventilate a rolling cage? We originally considered a solution that involved plugging a return flex duct into the back of a cage, similar to a dryer duct. However, this has proven to be clumsy, unsightly, and not very practical.  

The low-tech solution illustrated below accomplishes the same goal without the disadvantages.  The wall behind the cage is designed to accommodate the exhaust ductwork, while the supply is located in the ceiling in front of the cage. The cage must then be outfitted with a grille in the back. Most caging suppliers will work with their clients to have this grille installed in the cage while it is manufactured.

How to Ventilate a Cat Cage Insert Image

The cage is backed up to the wall, and air is naturally sucked through the cage on its way to the exhaust grille. In order to prevent air from rushing around the cage, we recommend placing a rubber bumper or neoprene gasket at the top and bottom and both sides of the cage along the wall to provide a better seal.

A mechanical engineer should be able to use volume measurements to calculate the CFM (cubic feet per minute) that will flow through the cage and adjust the overall volume of room air exchange accordingly. Our office uses 30 CFM per cage (depending on the size of the cage) as a guideline, because this volume of air exchange provides sufficient odor control without creating a feeling of air rushing through the cage. Even if you use less than this amount, the result will still be more satisfactory than in a typical ceiling-ventilated room, because the air is flowing in the direction that most benefits the occupants.

If the cage is built in, then the solutions depend on the cage configuration. Two-sided configurations are typical in cat adoption areas. Typically, the purpose of this design is to provide a front viewing area and a staff zone behind the cage.  The simplest solution for ventilating these cages is to supply the air in the public viewing aisle, pull the air through the cage, and exhaust on the staff side of the enclosure. This involves nothing more than providing a ventilation slot at the top of the cage on the front side. Your mechanical engineer should calculate the size of this slot. Our office typically uses a continuous slot of one inch. We locate the slot at the top of the cage to prevent the cat from being stressed by potential adopters.

  • For built-in cages that are against a wall, our favorite solution is to use a cage that has a built-in litter ventilation chase. This is a nice feature because it prevents litter odors from contaminating the rest of the cage.  It is important to remember that your design team should work with you and the caging manufacturer to ensure that the following problems are solved:
  • The cage should not have an all-glass front or there will be no way to pull the air into the cage. The ventilation chase must be accessible and cleanable to prevent litter dust from accumulating.
  • The chase and duct attachments must be sized properly to achieve the air exchange that is desired. Do not assume that the manufacturer has worked this out in a way that is satisfactory for your project. For a recent project, we worked with a manufacturer to create a custom duct attachment piece.

The ventilation chase solution can also be used in two-sided cat cage configurations if you wish to prevent litter odors and contaminated air from flowing into the staff zone behind the cages.

The solutions presented in this article are only some that are available to you. The purpose of discussing these possible solutions is primarily to raise awareness and create a dialog about this important issue. If we shift the paradigm from thinking about what is best for the room to what is best for the cat, then we are working together to dramatically improve the quality of life for cats in individual housing.

Tags: Animal Care, Contributing Editors, Animal Arts Editors

Introducing Shor-Line's New Contributing Editors.

Posted on Fri, Feb 03, 2012 @ 03:29 PM

If you are anything like the rest of America you are trying to get all the important information you seek and need in one place. You want it timely, accurate and unbiased. With this in mind we have invited industry professionals to be contributing editors on our blog.

In conjunction to our regular posts you will see architects, vet techs, shelter professionals and many others providing their industry knowledge. With the enhancement of our contributing editors to our blog we hope you find the Shor-Line Community a place where you can join the conversation, gain industry insight and contribute as well.

Next week our first article will be on the topic of "How To Ventilate a Cat Cage" by Vicki Pollard, AIA, CVT of Animal Arts. Vicki brings unique experience to Animal Arts with degrees in both architecture and veterinary technology. Prior to joining Animal Arts, Vicki worked as the Owner’s Representative during the construction of the Alameda East Veterinary Hospital campus.

VickiStepplerPartner fullAnimal Arts Logo White 600dpi


Vicki has proven to have an almost unlimited capacity for keeping track of owner’s requirements, specialized medical equipment and design details on complex, large-scale veterinary specialty facilities.

She has worked on a variety of projects since joining Animal Arts including the Coral Springs Veterinary Hospital, VCA South Shore Animal Hospital, VCA Kaneohe Animal Hospital in Hawaii and VCA West Los Angeles Animal Hospital, a premier 42,000 square-foot specialty referral center.

Check back next week to learn "How To Ventilate a Cat Cage". Our blog articles are published through our social networks (Facebook and Twitter) in real time. Let us know what you would like to discuss!

Tags: Animal Care, Facility Design, Contributing Editors, Animal Arts Editors